Allingo Dashboard Guide: How to Create New Shipments
Logistics management demands efficiency, accuracy, and clear visibility. Organizing and executing deliveries rapidly ensures operational success and customer satisfaction. By utilizing a centralized platform, businesses and individuals can dispatch packages effortlessly, accessing a network that allows them to send anything, anywhere. The interface is designed to help users send deliveries the smart way.
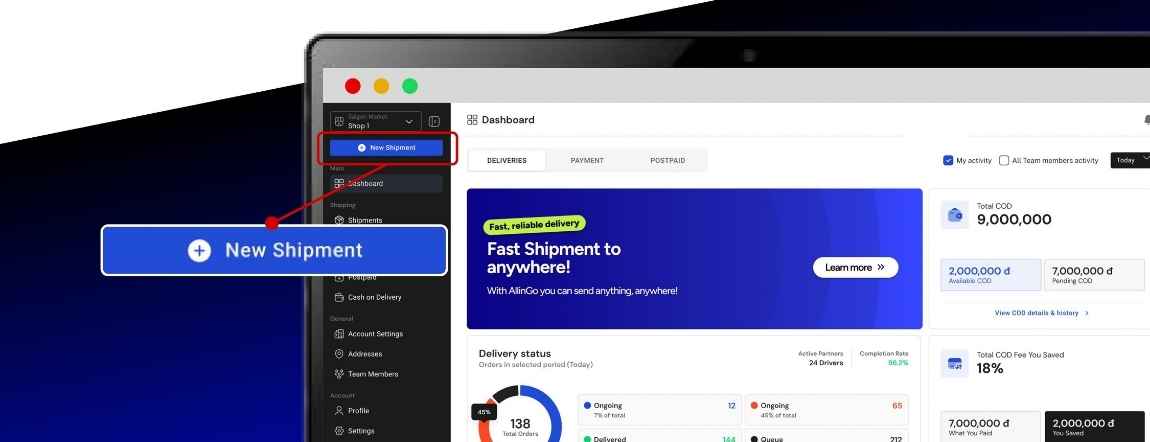
Step 1: Navigating the Dashboard Interface
The operation begins on the main administrative dashboard. The interface displays critical operational metrics, offering a complete overview of daily logistics activities. Users can view the current delivery status for orders in the selected period.
The dashboard also tracks financial data related to logistics. It presents figures for total COD, available COD, and pending COD.
Additionally, the system highlights the total COD fee you saved.

To initiate a new logistics task, locate the navigation menu on the left side of the interface. From your dashboard sidebar, click "New Shipment" to begin creating your delivery order.
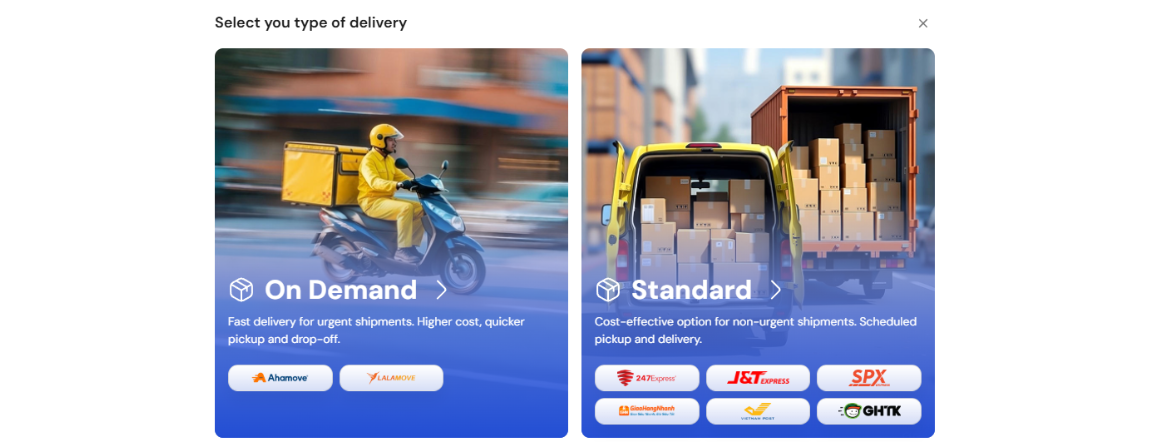
Step 2: Selecting the Delivery Category
Logistics requirements differ based on urgency and budgetary constraints. The system will prompt you to choose a delivery type. It is necessary to select the service that fits your delivery needs.
The platform offers two primary categories:
- On-Demand: This service is engineered for speed. It features fast delivery for urgent shipments. Because it provides quicker pickup and drop-off times, it operates at a higher cost. This selection is best for instant deliveries when you need a driver quickly.
- Standard: This service prioritizes cost-efficiency. It operates as a cost-effective option for non-urgent shipments. The standard category is ideal for scheduled or flexible deliveries with optimized pricing.
Evaluate the priority of the goods being shipped and select the appropriate option to proceed.
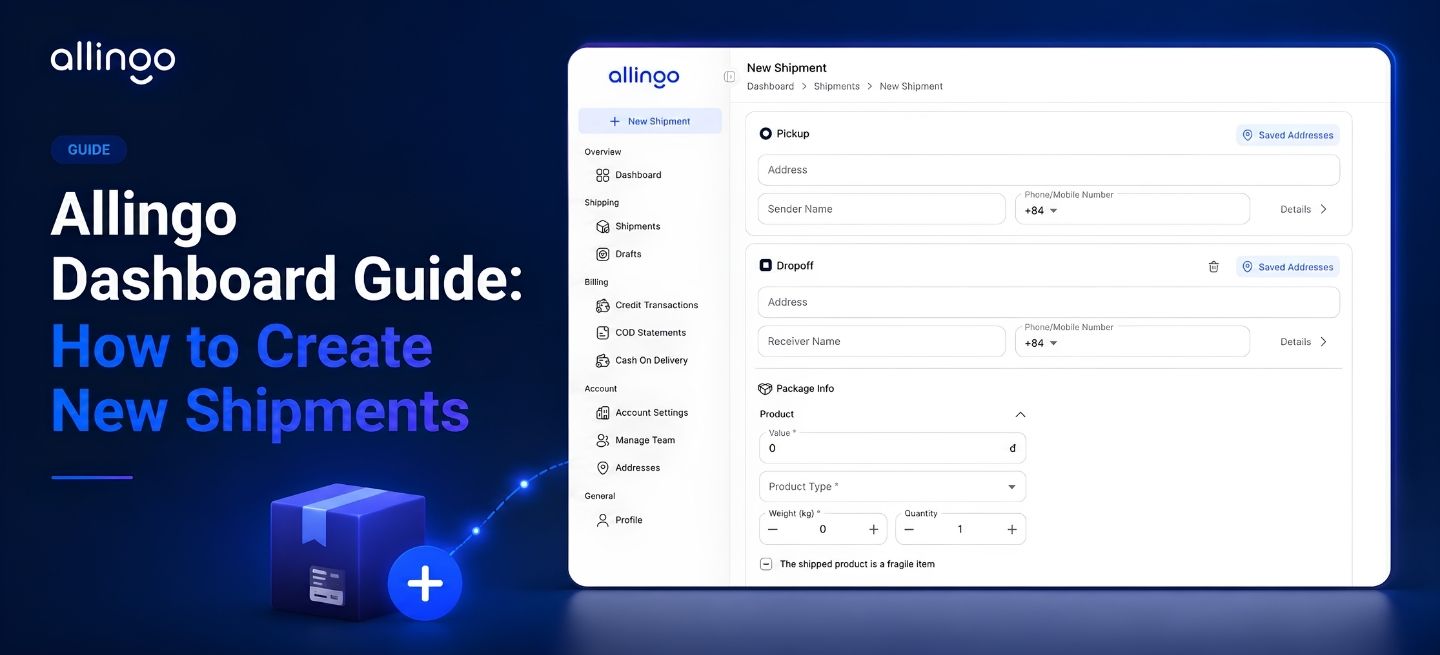
Step 3: Entering Comprehensive Shipment Details
Accurate data entry ensures proper routing and accurate pricing. Users must fill shipment details carefully. The platform requires users to enter the required information for pickup and drop-off locations.
- Location Data: Input exact addresses for the pickup and drop-off points, along with contact details.
- Package Information: Navigate to the package info section to define the physical attributes of the shipment.
- Select the relevant product category, for example, cosmetics.
- Indicate the exact size and physical weight of the item.
- If the contents require delicate handling, explicitly mark the checkbox indicating it is a fragile item.
- Financial Input: For transactions involving cash upon receipt, input the accurate cash on delivery value.
Step 4: Comparing Partner Delivery Options
Transparency is a core function of the Allingo dashboard. After submitting the requisite address and package parameters, the platform calculates potential logistics routes. Allingo shows available delivery options from multiple partners.
The platform facilitates a transparent comparison environment. Allingo partners with prominent providers such as Grab, ViettelPost, Ahamove, Lalamove, Green SM, J&T Express, VNPost, and many other partners to meet diverse logistics demands.
Users may sort these results to prioritize the cheapest or fastest available options. The system distinctly outlines the base delivery fee and the insurance fee. A notification on the dashboard also indicates a coming soon feature known as Urgent Order, allowing you to broadcast the order and get the fastest driver.
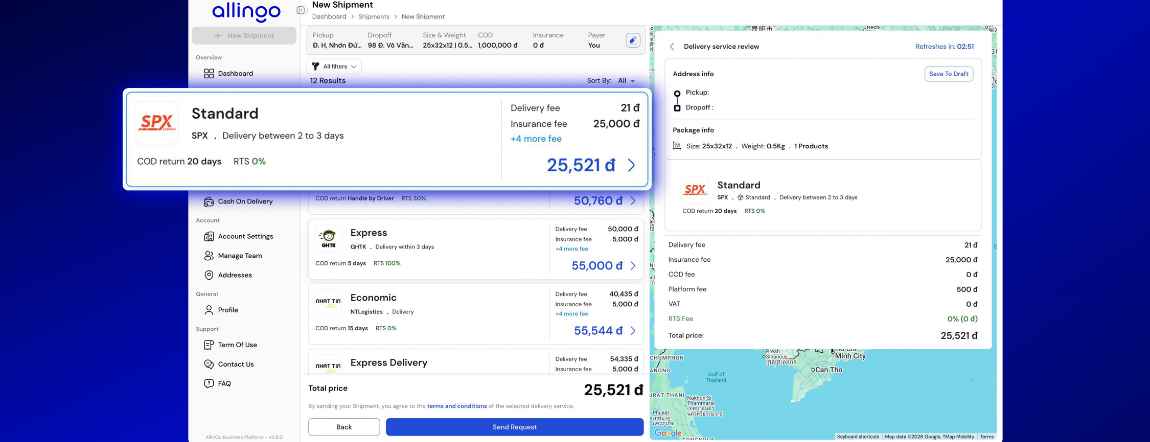
Step 5: Sending the Shipment Request
After thoroughly evaluating the list, choose the delivery option that fits your needs and prepare to send the order request. Selecting a service provider triggers a final delivery service review panel.
- Data Verification: Verify the precise text for the pickup and drop-off addresses to prevent routing errors. Confirm the package size, weight, and the number of products.
- Financial Review: The system displays a comprehensive breakdown of the total price. This calculation aggregates the delivery fee, insurance fee, COD fee, platform fee, VAT, and any RTS fee.
Once verified, click the "Send Request" button. Your shipment will immediately be sent to the selected partner for driver assignment.
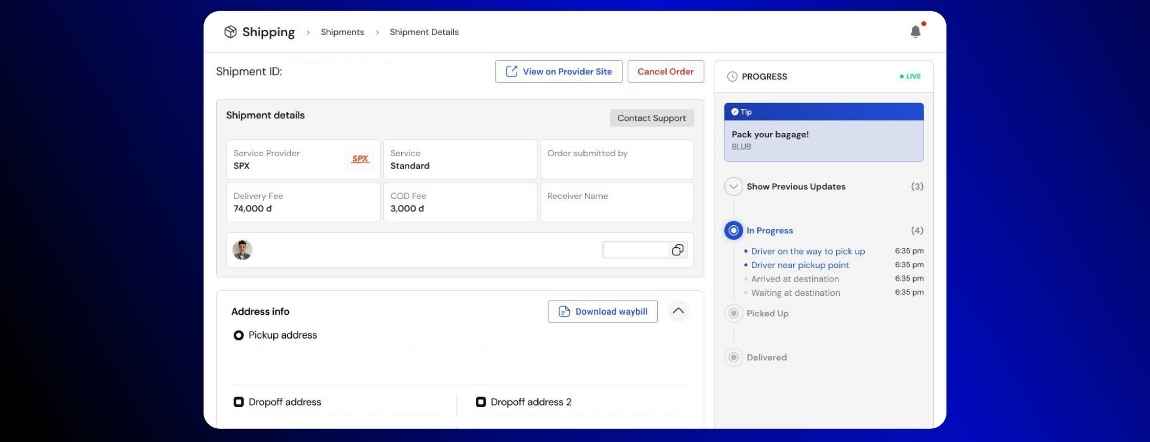
Step 6: Managing the Active Shipment
After sending the order, you can monitor and manage it directly within the Shipment Overview page. The platform provides delivery updates and helpful insights to keep your order running smoothly.
The interface features a live progress timeline that tracks critical milestones sequentially. Users can observe status changes, including:
- Driver on the way to pick up
- Driver near pickup point
- Picked Up
- Arrived at destination
- Waiting at destination
- Delivered
Beyond passive tracking, the management panel offers functional tools. Users possess the option to view the order on the provider site or utilize the cancel order function if circumstances require modification. Administrative documentation is available through the option to download the waybill. If logistical assistance is required, a direct link is provided to contact support.